русский
 عربى



The handle sits at the closed mark, the actuator light says closed, yet water still trickles past the disc into the downstream line. A maintenance tech listens at the pipe and hears flow that should not be there. Replacing the seat right away is tempting, but the cause is often smaller and cheaper than that.
A Stainless Butterfly valve can leak through a closed disc for several reasons: trapped debris, a damaged seat or disc edge, a disc that stops short of its position, or a mismatch with the fluid. Here is a practical order for finding the cause before parts come off.
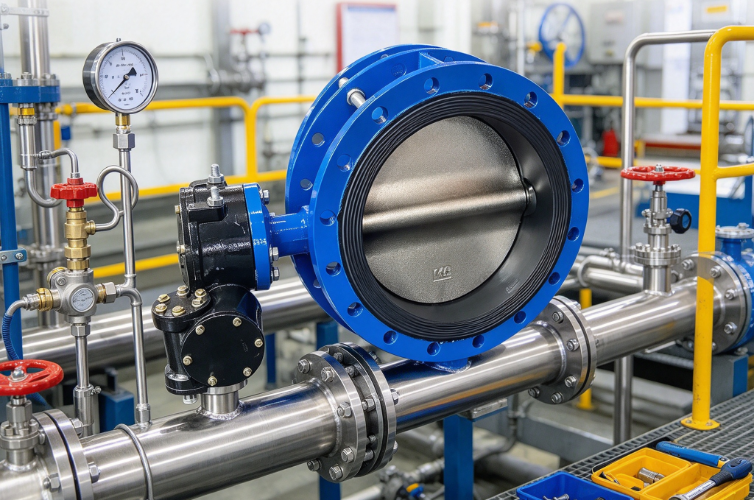
A butterfly valve turns a disc across the flow path until it meets the seat. A valve can reach a position that looks closed without making the sealing contact it needs. Before disassembly, check where the fluid appears.
| Observed Condition | Area to Check |
|---|---|
| Fluid passes through the closed valve | Disc and seat contact |
| Leakage around the shaft | Shaft sealing components |
| Fluid near a pipe connection | Connection and installation |
| Valve does not reach expected position | Operating mechanism or position setting |
| Leakage changes after repeated cycling | Debris, seat condition, or movement |
Wet pipework can make a flange leak look like valve leakage, so trace the source carefully from a safe position. If the fluid is hot, corrosive, or pressurized, have qualified personnel make the system safe before anyone approaches.
History helps. A valve that sealed yesterday and leaks today points toward debris or a mechanism change. Leakage that grew slowly points toward seat wear, corrosion, or surface damage. Also check what shutoff level the valve was designed for, since not every design gives the same tightness, and some passing flow may be within its specification.
Rust flakes, scale, fibers, or weld residue can sit at the seat as the disc closes. A small particle is enough to hold a gap open. This often shows up after pipe work, when loose material enters the line, or in systems carrying suspended solids.
Use the approved isolation and cleaning procedure to inspect the sealing area. Never force the disc against an obstruction. Extra force can cut the seat or bend components without clearing the particle. If leakage remains after cleaning, look for damage the debris may have caused.
The seat provides the contact surface for shutoff. Soft seats may show cuts, tears, swelling, hardening, or worn areas. Metal seats may show scratches, corrosion, or uneven contact. A small mark crossing the contact path can be enough to leak.
| Seat Condition | Possible Effect |
|---|---|
| Cut or torn surface | Creates a path for fluid |
| Deformed seat | Uneven contact with the disc |
| Hardened or swollen material | Changes how the seat meets the disc |
| Scratched metal surface | Interrupts sealing contact |
| Corrosion or material loss | Alters the contact shape |
| Uneven wear | Leakage in one part of the seat |
Judge condition against the manufacturer's inspection guidance. Avoid sharp tools or abrasive cleaning, which add new marks to an already damaged surface.
The disc works with the seat. A scratched, dented, corroded, or deposit-covered edge will not seal even against a good seat. Examine both parts, because a new seat will not cure a damaged disc. Check alignment and freedom of movement as well. Do not grind or polish sealing surfaces without an approved method, since that changes the geometry.
If the disc does not complete its travel, the surfaces never meet properly. Causes include a handle or actuator setting, worn linkage, or an obstruction in the mechanism. An indicator may show closed while the disc is not. Compare the indicator with the manufacturer's instructions, and have qualified staff review actuator travel settings.
Raising closing force rarely helps. It can damage the seat, shaft, or mechanism, and makes things worse if debris is the real cause.
Misalignment, poor pipe support, or stress from connected piping can affect disc movement. Nearby equipment may stop a handle or linkage from moving freely. If the problem began right after installation or maintenance, suspect assembly, alignment, or position setting before ordinary wear. Correct these under the approved procedure rather than adjusting the mechanism alone, which can hide the symptom.
Some fluids attack certain seat materials, others carry abrasive solids, and temperature swings change how components behave. Frequent cycling wears the contact area. A change in fluid, cleaning method, or temperature can expose a weakness that was not visible before. Stainless construction does not mean every internal part suits every fluid, so check wetted materials against actual service.
Follow site safety rules and manufacturer instructions for any work that opens the valve.
This order separates a simple obstruction from damaged surfaces or an operating fault, and it leaves a clear record of what was checked.
Cleaning works when loose debris was the only problem and the surfaces are in good condition afterward. Replacement becomes likely when the seat is cut, deformed, chemically damaged, or worn beyond the manufacturer's limits. Damaged metal contact surfaces may need specialist assessment. A surface that looks clean can still hide damage, so unclear cases deserve a qualified inspection.
Ask why the part failed. Abrasive particles, unsuitable chemicals, excess closing force, or poor installation will damage the next seat too.
Routine checks catch changes early. Note whether the valve closes smoothly, whether leakage has changed, and whether the mechanism moves unusually. Use only cleaning methods and tools the manufacturer approves, and isolate the valve before inspection. Where the system carries solids, look at upstream filtration or deposits to reduce what reaches the disc.
Keep records linking leakage observations, operating conditions, findings, and repairs. Over time they show whether trouble comes from one-time debris, normal wear, or a valve that does not suit its duty, which makes every Stainless Butterfly valve easier to maintain.